The Go-Pod Khyam Awning - Set Up Advice.
Posted on
NB: This item is currently unavailable.
We had this recent request for help with the awning and thought it might be useful to share it and the reply:
Q:
"I would like some advice on the best way to fit the awning to my Go-Pod please. Any tips would be gratefully received!"
A:
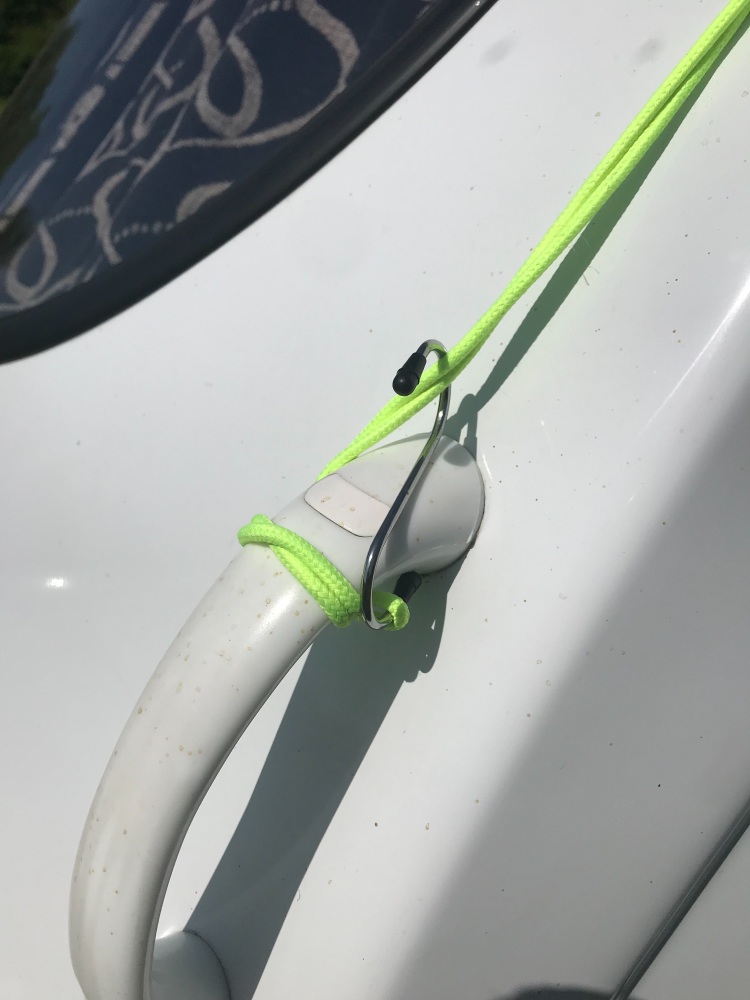
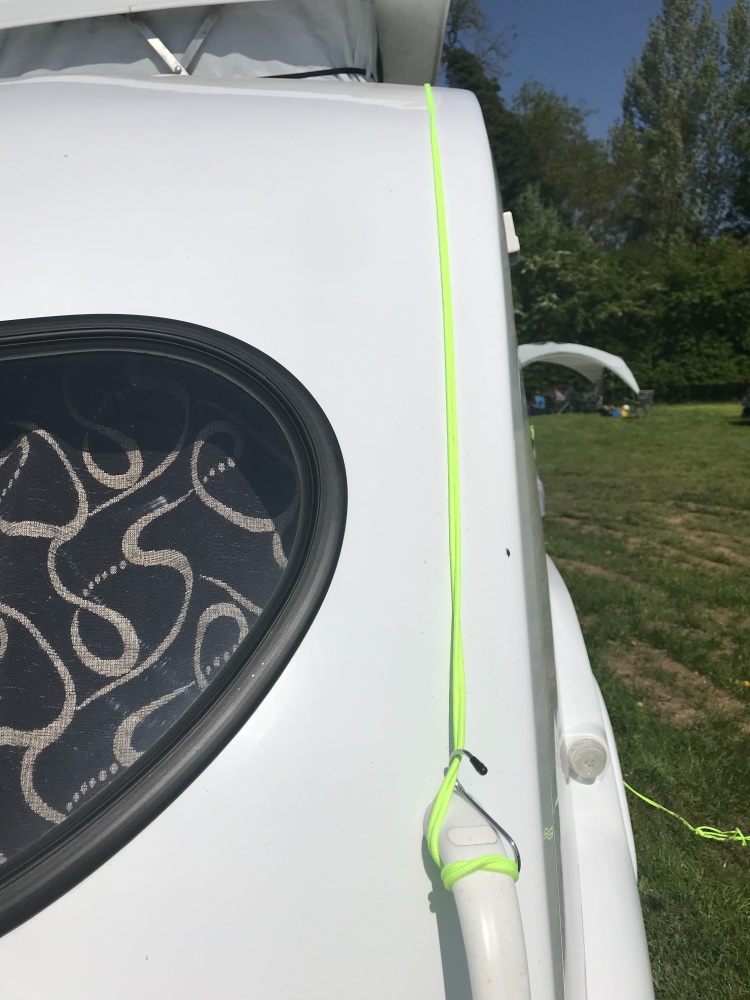
Most owners take the awning's two front guy ropes and tie them forward to the Pods' front grab handles, as shown in the photo below. Ensure both ropes are the same length and tie them off so that the fabric of the awning stays just shy of the Go-Pods pop top opening. That way the awning won't foul the pop top if you need to close it in bad weather. The ropes should lie along the top surface of the Go-Pod and not be diagonally crossed.
Some people use simple 'S-hooks', (as shown below), to fix to the handles, so that it’s quicker and so the guy ropes are always the same length, every time. Others mark the guy ropes so ther is a visual indicator of where to tie them off.
1. Errect the awning so that it's a free standing structure & ensure it looks aligned straight from the rear of the Pod.
2. Affix the front ropes to the grab handles as explained above & shown below.
3. Peg down only the open ends of the elasticated tunnel section, placing the pegs well underneath the Go-Pod itself - near by the stabiliser legs - on both sides. This will secure the bottom part and keep the elastic sides nice and tight.
4. Walk the whole awning structure backwards, away from the Go-Pod until the tunnel goes nice and tight. Ensure that the whole structure stays as straight and as squarely aligned as possible.
5. Peg the whole thing down.
TIP: Taking the two rear guy ropes from the very back of the awning, peg them down tightly in a backwards direction, away from the Go-Pod. So in other words, directly backwards in a straight line. This has the affect of further tightening the tunnel section.
[Do not peg down the whole awning first and move the Go-Pod towards it! I have heard this suggested and it's a certain recipe for disaster!]
We recommend that the doors and the inner divider of the awning be zipped shut before peg down the awning's legs. This will ensure you'll be able to unzip them easily after pegging. Stand back and check if it looks right before proceeding to peg it down further and adjust if necessary.
Pegs are provided with the awning but it's a good idea to take some extra, metal hardstand pegs and a decent club hammer. Those are the pegs that are like 6” nails & work in every scenario.
Watch that the webbing straps between the awning's legs aren't wrapped around the feet and that they are as taut as possible when you peg it.
Its normal for it be a little different each time, due to the lay of the land and so on but with some care & practice, you'll find its a really great awning, even in pretty strong winds!


Additional info:
Some people add a strip of awning bead to the top of the tunnel end, instead of using the forward guy ropes method. Having tested both ways, we feel that neither has any major advantages and that this is a matter of personal preference. Stitching a bead in place is best done with an industrial sewing machine, while stretching the elasticated section out flat.
We did work with Khyam one season to produce a special Go-Pod version of the awing which had awning bead attached and the Go-Pod logo. However, as the production quantities we were able to order were relatively low, this was dropped when the item became outpriced. The regular Khyam awning supplied now is offered at the same RRP as the manufacturers and is included within the PLUS and Platinum models.
